Friday 25 November 2011

Mutimedia in Education(Week 9 - 10)


Assalamualaikum and a very good day to all...

This week I've been assigned to explore multimedia usage in education. Several software have been introduced and recommended in order to complete this week assignment:

For 2D Graphic Editing Software:
  • Microsoft Paint / Paint Brush
  • Shapes/smart Art PowerPoint
  • GIMP (OSS)
  • Online -Google draw (collaborative drawing)
  • OpenOffice Draw (OSS)

For Desktop Publishing Software
  • Microsoft Publisher
For Word Processor Software

  •  Microsoft Word
  • OpenOffice Writer
  • Online Word Processor (Google doc )


Vector vs Bitmap


Figure 1.1 Vector vs Bitmap


This week I've learnt that there are two types of  image files, Vector and Bitmap image files. Vector-based image files ( contains of extensions such as .eps , .cdr , .ai or .dwg ) and Bitmap-based image files ( contains of extensions such as .jpg , .gif , .tif  or .bmp). Several differences between both of the image files can be identified, one of those can be seen from the pictures above. We should know the differences between these two types of image files, how they are analyzed by computers and the strengths and weaknesses of both images files.

Vector Image


  •  Contain well-defined elements such as curves and shapes of various colours. 
  • Pure graphics, western alphabets or Asian characters are the example of these elements. 
  • Computer defines each element mathematically. For example, if a vector-based image contains a pink dot, then information such as the location of the circle's center point, the length of it's radius, and the colour itself, pink, would be essential information for this image file. 
  • Moreover, Vector image file is more suitable for illustrations that require precise measurement. 
  • Due to their mathematical nature, they are easily scaled. 
  • The disadvantage of this file is it is not good for displaying photo-realistic images such as photograph because images of this type generally do not contain well-defined shapes and curves. 
  • Differ to graphic such as logos of company, Asian characters like Japanese Kanji they are well defined and are most suitable in this image file.

Bitmap Image 

  • Doesn't rely on mathematical formulas to define each of their various element. 
  • Bitmap images are generally mapped into a grid from bunch of pixels based on the size of the image like a mosaic of pixels. Besides that, each pixel holding a specific colour value in each image. 
  • Bitmap image are easily to get, we can snap using camera, scan from a photograph or drawing. 
  • However, this kind of image files are not easily scaled, we make a bitmap image smaller without losing quality of the image. But, the image would lose its sharpness and the edges when we enlarge it.
  • On top of that, bitmap image require more place to store in computer memory. Due to the fact that, the file contains each information of each pixel of the image.


This is what I produced after exploring all the software recommended... 


Figure 1.2 
Using Microsoft Paint - Paint Brush


Figure 1.3
Using Power Point - Smart Art (group all the shapes and save as picture)


Figure 1.4

I change the colour of her eyes using the tools (a hand drawn region, polygonal segments + colorize)  and colour her lips and eyelids with brush(circle fuzzy) + mode:Overlay. 

Figure 1.5
I edit the picture from Paint which I made earlier, at GIMP. For tree and clouds, I use brush (circle fuzzy) + Mode: Dissolve and for the wall of the house I use brush (sand dunes).

Figure 1.6
I use the same brush (circle fuzzy) + choose Mode: Saturation and  change the opacity to make the colour of the teeth looks real (Whiten Teeth using GIMP)
Using GIMP (OSS)


Figure 1.7
Figure 1.8
Online - Google Draw (Collaborative Drawing) using shapes and text.


Next,

STEPS TO CREATE BROCHURE

First of all, select Microsoft Office Publisher from the Start button. Refer to Figure 2.1.

Figure 2.1


Then, kindly selected 'Brochure' from the Microsoft Office Publisher. There are several other popular publication types which can be produced from this software, such as, business cards, calendars, flyers, email, greeting/invitation cards, newsletters, resume and etc. I've started using Microsoft Publisher since primary school, I made Happy Teachers' Day card, Happy Birthday Card and even trying to make my own Business Cards. Hence, it's a lot of fun to explore. Refer to Figure 2.2.

Figure 2.2

After that, choose any template that suit the information of the topic or any template that will make readers interested and impressed to look at it. Refer to Figure 2.3.

Figure 2.3

Besides that, the preview of the brochure can be seen at the right side while choosing the template. Customization can also be made like changing colour scheme, font scheme and business information. Hence, there are several options on page size which you can choose whether you want 3 or 4 sections for your brochure and form which can be choose based on the suitability and own interest. After that, click 'Create' button. Refer to Figure 2.4.

Figure 2.4

Puff! Then, your first draft of brochure is ready to be filled with any information you want to put in.
If you still do not satisfied with the color scheme, you can always change it while doing the process of filling up the information. Refer to Figure 2.5.

Figure 2.5


On the first page, we can write our business name or tagline as well as the title of the information. We are free to insert any image or picture to the brochure. As you can see, I put an image of 'software and CD' to let readers know the gist of the information in the brochure. The image has been made by me myself at  'Google Docs - Draw'. Refer to Figure 2.6.

Figure 2.6

On the second page, we can started to write up all information that we want to include in the brochure. Refer to Figure 2.7.

Figure 2.7

After completing all information in your brochure, make several editing, check any punctuation mark or spelling error to make readers satisfied reading your brochure. Lastly, print your brochure!


Finally, 


STEPS TO CREATE BOOKLET USING MICROSOFT WORD


Before I proceed to the steps on how to create booklet, let me tell you what are booklets...


Booklets 

  • Small books , usually having an interesting and eye-catching paper cover.
  • Information documents
  • The term 'booklet' usually implies more than one page. 
  • Usually, they are printed on high quality stock, impressive designs and eye-catching fonts.
  • Promotion tools used by companies to market their products and services.
  • Creating an effective, impressive and informative booklet is the key for a successful booklet.
  • Different types of booklets are pamphlets, leaflets, catalogs and annual reports.


Figure 3.1 Several types of Booklet


Now, 

Step 1  : Go to Microsoft Word and start with a new document.

Step 2 : On the Page Layout tab, click the Page Setup dialog box launcher, change the setting    as follows. (Refer to Figure 3.2)
  • Margins - Decrease the top, bottom, inside, and outside margins to at least 0.5 inches to give more space to use on a page.
  • Add gutter margin of 0.25 inches (the space between the two facing pages; where the fold is).
  • Orientation - Select Landscape.
  • Multiple pages - Select Book Fold to set up your document to print in landscape page orientation with two booklet pages on each side of a sheet of paper.
  • Sheets per booklet - select All or Auto (there are four booklet pages per sheet of paper).
  • Click OK.
Figure 3.2 Page Setup 

Step 3 : *Optional - You can choose any theme you desired to make your booklet look impressive and interesting. Decorate it with images, insert border or anything using your creativity. Refer to Figure 3.3.


Figure 3.3

That's all for this week.
I hope you can create your own brochure and booklet too.


Sunday 13 November 2011

Statistical Package for the Social Sciences (SPSS)

Assalamualaikum and a very awesome day to all!!!

I hope everybody is fine and in a good condition....
Today, I'm going to reflect about SPSS....what is it?
Have you ever heard about it? Absolutely your answer is NO....
Me myself never heard about SPSS before I take this Computer in Education course...


Now, let me tell you a little bit about SPSS from my understanding. Statistical Package for the Social Sciences or best called as SPSS is a data management and analysis product produced by SPSS.inc.in Chicago, Illinois. This data management and analysis product is produced to help and most suitable to use for survey research. Besides that, it will ease the process of gathering and analyzing research data regarding on its features are modules that consist of statistical data analyzing, including descriptive statistics such as plot, graph, charts, tables, lists as well as a sophisticated inferential and multivariate statistical procedures like analysis of variance (ANOVA), factor analysis, cluster analysis and categorical data analysis.


After collecting all the data survey that we get from the Survey Monkey, http://www.surveymonkey.com/s/LBZ5RTG and Google docs spreadsheet, https://docs.google.com/spreadsheet/viewform?formkey=dG9rTXFBNVkxR1duLU1wU01USUwxZ0E6MQ we can start fill the data in the SPSS.


If you have existing data, you can just choose and continue doing your statistic but if you don't, just create a new one.

Fill in all the data in the form. Just refer to the picture what should be filled in each form and column.


Complete all the data needed in the statistic like the above picture and then click analyze.


Choose Descriptive Statistics > Frequencies > choose any variable > Statistics or Charts > click Continue and OK. The output will be processed and the research on the survey findings will be come out.


This is the example of output that has been transferred in the report. 


That's all.
I should learn more and try again and again in order to be capable of using this data management in future.


Thank you for visiting my blog...
Please come again and have a nice day!


Monday 24 October 2011

Computer in Educational Research (Week 5-6)

Assalamualaikum and hye everybody,


Educational Research Process


In conducting educational research, we should explore, describe, explain, or predict the educational phenomenon using systematic data collection and analyze the procedures. According to Creswell J.W.(2004) there are several steps that should be followed by educational research studies in order to produce an excellent educational research. For example, the steps are planning, data gathering and analysis, and reporting process which consist of the following steps:

PLANNING

  • Step 1 - Identify the problem or topic
  • Step 2 - Review prior research
  • Step 3 - Determine the purpose, research questions, or hypotheses
  • Step 4 - Consider research implications
  • Step 5 - Construct a research proposal
GATHERING DATA
  • Step 6 - Gather data
REPORTING RESULTS
  • Step 7 - Analyze Data
  • Step 8 - Determine findings
  • Step 9 - Report conclusions, implications, and limitations
So, that is the process that can be a guideline to our mini research.
All the best!


Online Questionnaire - Survey Monkey


Assalamualaikum and a very warm afternoon to all,

Today, I've learned how to create questionnaires using survey monkey. I've never done such questionnaire like this. This is totally new to me. However, with all the guidelines given, I've try to explore with my other colleagues on how to create questionnaire using http://www.surveymonkey.com/. Before I  create the survey, I sign up first, it is free.


Then, there is two choices, whether fill in the particular information needed or just sign up with Google account. I choose to sign up with Google account because it is easier I already have a lot of password to be remembered and I'm afraid I can't remember those if I create a new one.


Now, I can start creating my questionnaire. 
There's several steps required to design and administer a questionnaire:
  • Define the objectives of the survey
  • Determine the target group 
  • Write the questionnaire
  • Administer the questionnaire
  • Interpret the results

My partner and I already done designing our questionnaire survey based on the title
'Original and Licensed Software. I hope all of you can enjoy answering our survey at http://www.surveymonkey.com/s/LBZ5RTG . Your participation will be appreciate.


Google Docs/Form - Printed Questionnaire


We can also create questionnaire using Google Documents or preferably called 'Google Docs'. This questionnaire can be printed and distributed to any students in UKM to the respondents of our survey.


  • The first thing you should do is to log in to Google account using your username and password.
  • Search for 'Google Documents'.
  • Click 'CREATE' and select 'FORM'.


  • You can start writing your survey, add your survey title at 'Untitled Form'. 
  • Below it, write any information regarding your survey.
  • Write your question at 'Question Title'.
  • Select 'Multiple Choice' at 'Question Type'. (Optional)


  • Complete all your questions and save it.
  • You can choose the 'Theme' for your survey to make it interesting and impress the respondents.
  • Copy the link under the survey and post it at Facebook Group to let your friends answer the survey. 
  • https://docs.google.com/spreadsheet/viewform?formkey=dG9rTXFBNVkxR1duLU1wU01USUwxZ0E6MQ
  • All the data will be used in SPSS analysis later on.
  • You can print the questionnaire and distribute to other students to make variable respondents  in your survey statistics.
  • You can see the complete survey at the website. Thank you and have a nice day!


That's all, thank you. I'll write to you again sooner.

Tuesday 18 October 2011

Original And Licensed Software


My partner and I choose this topic because we thought we have some background knowledge about this topic and we thought it was easy to search about the information. However, once we start ‘googling’, we found that there’s a lot of information which relate to this topic but we can’t search the exact information we want.
But then, when I go back to my room, I try to figure out how I can find the exact information about original and licensed software are all about. Thus, I decided to type the title separately. First, I search for Original Software and then, I search for Licensed Software.
After I get some information about the topic, I read through the whole passages, page by page. It was so horrible that I can’t understand what are the topic is all about. However, with  full of determination, I try to read again the next morning. I try to get the meaning and straight away rephrasing the sentences in order to prevent from been accused as plagiarism and make the things clearer for myself as well as others who read this. After that, I discussed with my partner, Nor Khairunnisa binti Mazlan to get the information crystal clear as working in pairs will enhance our understanding towards the topic. Finally, we manage to understand and continue our task.
I hope that you will get some information about this topic from our understanding.


Original and Licensed Software

What?
Original Software can be defined as an authentic and genuine program written by a software engineer. It is produced for the first time and not photocopied from other software. Moreover, there is no piracy or duplication. The software is originally produced by a specific person.
Licensed Software can be defined as software which has been given a license before it can be used by user. An end user and a software publisher of the licensed application should have a contract of agreement before using the software. This process is called software licensing.

Why?
Software publisher needs to license their software in order to protect the software from piracy, duplication, redistribution or software infringement by any irresponsible party. Besides that, it is emphasized that software publisher should critically license their software to the recipient very carefully in order to retain the intellectual property rights (IPR) and the ability to generate revenues from their work. As software is licensed, the publisher is protected from the unpredictable circumstances that might happen as consequences of using the software. For example,  or if there is anything happen like crash to loss of data, time or income from using the software, users can’t blame or take any charge to the publisher. From the user aspect, they should use only the original and licensed software even though it is much more expensive than the unoriginal one in order to protect their computer and preventing from accusation of software piracy.

How?
A contract of agreement between a software publisher and an end user of the licensed application is a software licensing. It can be a paper agreement but it is usually embedded in the software itself as part of the installation process. However, there is a requirement of considerable legal expertise to manage and negotiate the much more complex agreements in larger corporations. This contract of agreement protects the author’s copyright and intellectual property rights (IPR) by placing restrictions on the end user in relation to the usage of the application. Duplication for purposes other than backup, installation on more than one computer, editing the code, or changing the program in any way is usually forbidden unless the product is ‘open source’ are the examples of restriction which have been proclaimed to give software publishers more control over the way their software is used. When the software is already licensed, and the originality and authenticity has been proven, automatically all the functions of the software can be used.

Where?
We use original and licensed softwarein any firm, university, college, school and even house which owns computer.

When?
In any time while using computer we are most probably using original and licensed software. Before we start working with computer, we are critically advised to check and license each of the software which have or will be installed.

References


That's all for today...
Thanks for visiting my blog...
Please come again and have a nice day!


Friday 14 October 2011

Course / Learning Management System

Hello everybody,

My partner and I already completed the assignment on Course/Learning Management System (C/LMS). We found that CLMS enhance our learning process as it allows students to communicate or interact with lecturers or their friends anywhere and anytime they want. The software which have been built like SPIN help to enhance the flexibility of the learning process. Students can look through the announcements, lecture notes, online tutorial as well as online quizzes. Thus, it is also save money, time and energy.

I hope that you can give response or feedback on the topic.

COURSE/LEARNING MANAGEMENT SYSTEM ( C/LMS )

Course or learning management system is a software application that based in web technology that is used to plan, execute and assess learning process.Usually , a learning management system provides an instructor with a way to create and deliver content,monitor students participation and students performance.Besides,a learning management system can also provides students with the ability to use interactive features such as videos conferencing,and forum discussions.This system is a software package that enables the management and delivery of learning content and resources to students. Most of the LMS systems are web based to make students or instructors to access learning content and administration at anywhere and anytime .

WHY PEOPLE USE C/LMS?

A learning management system paly the important role in the field of education  especially for educators and students.LMS provides many types of e-learning and look for the best of programmes or software based on their requirements.This is because LMS  have the best features including of data sharing,documents and catalog for the courses that have been reviewed and very useful especially for students.Other than that,CLMS also plays the important role in business.Any business need a programme that can help them to manage conferences,and enables to allow information and  various documents  and change through internet.This is because LMS have some other applications that can increase the communication.

WHO USE C/LMS?

Nowadays,there is a lot of demand of the usage of Learning Management System to enhance the effectiveness of learning process.They search for the best of the programmes or software to meet their requirement.It has been so many years,people are increasingly realized the significance of having a competent environment for e-learning.Let’s go to the straight to the subject matter,the users of CLMS are increasingly bigger,most of them are from educational institutions such as educators ,instructors and students.Instructors can manage their courses and exchange information with students.For a course that in most cases will last several times during those weeks.Thus,the course may be much shorter in length,completed in a single instructor-led event or online session.On the other hand,CLMS also plays a vital role in the world of business .Employer can manage  their  employee and exchange information and various documents via internet.They also using CLMS to help them in managing video conferences to make their business run smoothly and effectively in just a minute.

THE ADVANTAGES OF CLMS

There are a lot advantages by using Learning Management System especially in the field of education and business.Examples of the advantages are facilitate e-learning with an online learning platform,tracking and reporting to enhance performance,combined all training information into one system,manage and track staff training with an LMS many others.

• FACILITATE E-LEARNING WITH AN ONLINE LEARNING  PLATFORM
Thera are many benefits of e-learning, and while an LMS is not essential to implementing online learning it can often make it easier to manage and deploy. Some of LMS solutions include tools to help author e-learning courses, and almost all decent systems can easily import courses in various industry standard formats for example SCORM that have been created using separate authoring tools. An LMS often provides a single, branded portal for e-learning delivery.

TRACKING AND REPORTING TO ENHANCE PERFORMANCE
The LMS also allows organizational users  to review a required learning path,track progress against the learning path,review records of success and register for additional courses.Employers can offer these course through various media including instructor-led training ,web-based training  or webinars.management can access the same records of records and can also analyze the records data to determine areas of sucess for needed improvement.

• COMBINED ALL TRAINING INFORMATION INTO ONE SYSTEM
There  should be easier and much benefits to having all training information in a single, consolidated system. Through that you can review and report on the status of company-wide training programs, identify staff who have completed certain qualifications, and much more.Its diferent and useful  rather than having to search through several disparate systems and paper files to find what you need, the right LMS puts all training information at your fingertips

MANAGE AND TRACK STAFF TRAINING WITH AN LMS
Then,training administration can be time-consuming and difficult, particularly in medium to large organizations with many staff working in different roles across a variety of physical locations. The right learning management system  can streamline this administrative effort, making it easy to ensure each staff member receives the appropriate training as well as helping manage the classrooms, instructors, equipment and other resources needed to deliver the courses.


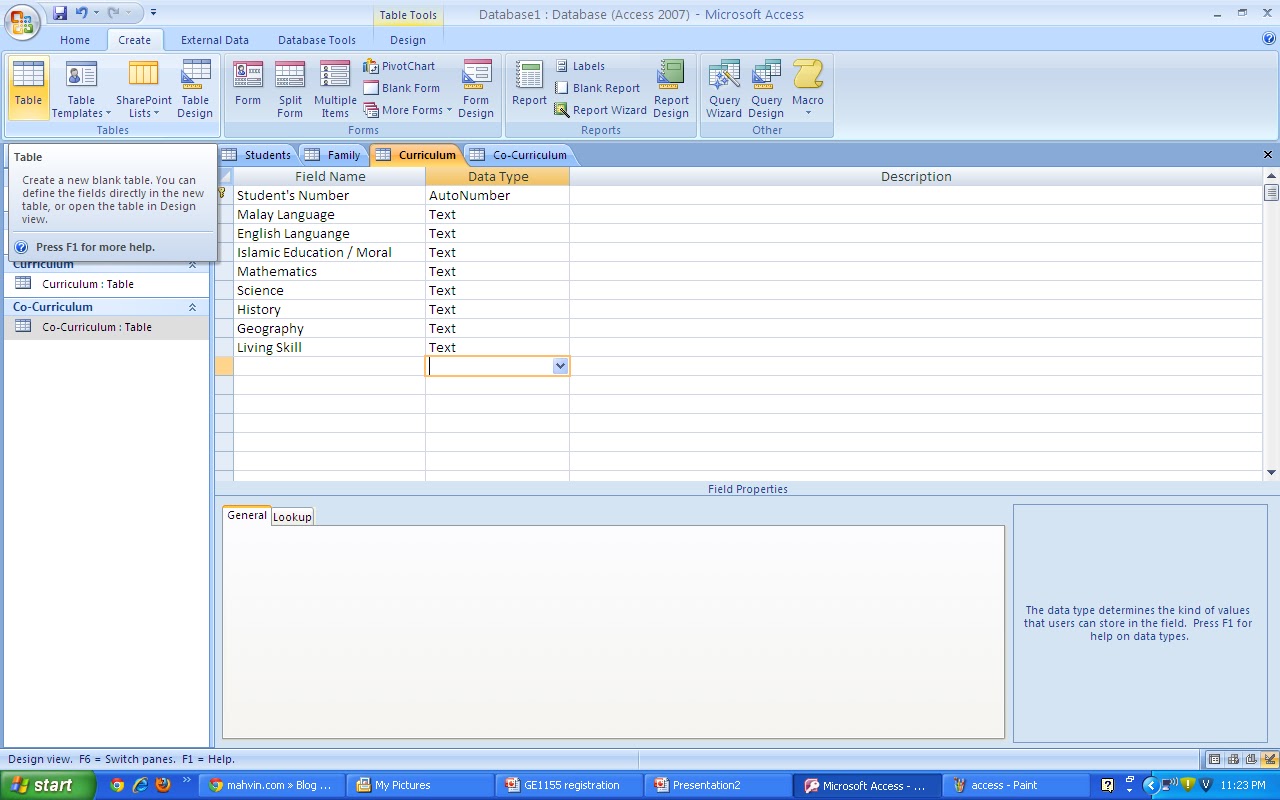
EXAMPLE OF COURSE/ LEARNING MANAGEMENT SYSTEM AT UKM
- SPIN BANGI -


What is SPIN?

SPIN is one of the examples of Course/Learning Management System which has been set up to make teaching and learning management to become interactive. This system has been used at National University of Malaysia, UKM to make the teaching and learning process more interactive, innovative, flexible, and easier. Lecturers and students can interact with each other using this system anytime they want whenever they have problems or difficulty regarding on their learning subjects. Besides that, other institution; public university, colleges and schools around Malaysia are also has been using this system to enhance their teaching and learning process in interactive way. Thus, through this system lecturers/teachers and students can communicate to each other without spending too much time and money. 

How to Use SPIN?

Before we can start using SPIN, we should apply our password at https://smp.ukm.my/smpweb/ using our own email account. So, make sure that your email account is still valid because the password will be sent through your email. So, SPIN can only be used by UKM students and staff, using their username (matrix card) and password (which has been given by the system through email). Then, you can straight away start using SPIN. You can upload all the course proforma for all subjects taken, email your lecturer and course-mate, uploading all the notes, answer quizzes as well as look at the announcements made by any lecturer of the courses that you are taking on that semester.

Who Use SPIN?

SPIN is especially built only for National University of Malaysia students and staff. So, only lecturers and students at UKM can use this system.

Why We Should Use SPIN?

Significantly, SPIN enhance the interactive of teaching and learning process. This system make the process easier for students and lecturers. They can communicate with each other through the system without wasting too much time and money. Moreover, in this rapid technological development, everything is use with technology which enforce everybody to use the technology to ensure the process of teaching and learning goes smoothly.

What can we get from SPIN?
  • Announcements from lecturers
  • Download course proforma and all the notes 
  • Look for questions and guideline for assignments  
  • Do quizzes and online tutorials
  • Chat or Email to lecturers and other course-mate
Advantages of using SPIN

  • Easy to interact with lecturers
  • Can access the data easily
  • Lecturers can upload notes anytime in just a minute
  • Can get information in fastest way
  • Students will be autonomous in managing some their own learning process
  • Lecturers can save cost and time in distributing notes
  • Students can download the notes before the class and do online tutorials in a fun way
  • Calendar can be used as date reference if any changes happen on lectures time and date


Sunday 9 October 2011

Signature

Assalamualaikum and a very nice day to all,

I would like to share about what I have learnt in Yahoo!.mail.
In Yahoo!.mail, we can insert our signature (email addresses or url from any generator) to indicate our additional information.


After I completed all the registeration of Yahoo!.mail , Yahoo! Groups, Gmail, Blog, Facebook and Facebook Group, I can put all the url at my Signature.


This is how I set the signature :
  1. Find and click Options > Mail Options link (on top of the page at the leftside)
  2. Find and click Signature link (at the leftside)
  3. Choose  > Show a signature on all outgoing messages.
  4. Fill in the blanks with all the information about ourselves.
  5. Save all changes.


That's all for now.
Thanks for visiting my blog.
Have a nice and wonderful day!


.